Map Your Domain to Tumblr
Posted On July 30, 2018
Mapping your domain is an important part of yourweb.csuchico.edu; it reinforces the idea that you don’t necessarily need to host all your own applications. You should, however, be mindful of making your web presences part of a domain you control. If you would like to map a subdomain and have not yet created it, use this tutorial on creating subdomains before proceeding. To map your domain, or a subdomain, to Tumblr, use these steps:
-
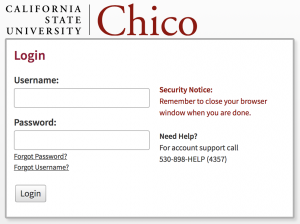
To get started you’ll need to login to your control panel by logging into http://yourweb.csuchico.edu/dashboard.

-
Here you’ll login with your CSU Chico username and password.
-
Once logged in you’ll be at the homepage of your control panel. The easiest way to navigate the cPanel is using the search feature in the top right panel. Click the Search box and type “DNS” (without the quotes). As you type, the cPanel page will begin to narrow down results. Find and click on Advanced DNS Zone Editor to continue.
-
Find the domain, or subdomain, you want to map to Tumblr in the list of Zone File Records. Under the Action column, click Edit.
-
Leave the Name, and TTL fields set to their defaults. Update the Type drop-down menu to CNAME, and the Address field to domains.tumblr.com. Click Edit Record when you are done.
-
Visit the Tumblr website, and login with your Tumblr username and password.
-
After logging in, click the Tumblr Settings icon.
-
For the Tumblog you’d like to use under the Username click the pencil icon to edit these settings.
-
Check the Use a custom domain checkbox. Type the name of the domain or subdomain you want to map to Tumblr into the box, then click Test your domain.
-
If your domain mapping was successful, you’ll see a message that your domain is now pointing to Tumblr. Click the Save button before leaving the page. Keep in mind that it may take up to 72 hours for your domain or subdomain to correctly point all visitors to the correct location.


